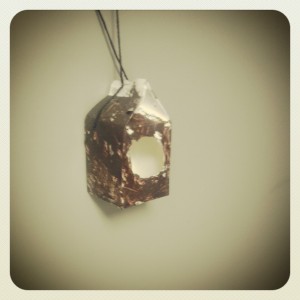
DIY Birdfeeders Made From Milk Cartons
Kathryn Winn Primary school in Carrollton, Ky. wanted a way to reuse milk cartons. This sounded like a great project for STEAM Day (which stands for science, technology, engineering, art and math).
Many people volunteered for STEAM Day and taught a lesson on any subject. One class taught them to dance.
Because Rumpke is the school's recycling partner, I taught a class on recycling with first and second graders. In several sessions, I showed more than 150 students how to re-use or repurpose products from their school to make a bird house. We re-used milk cartons, leftover paint, and juice cups (as paint bowls).They had fun trying to guess what things we were re-using in the process.
The kids had a lot of fun and some of them told me it was the best class they had all day. It was a challenge keeping paint off the kids, but we did good.
Download our Celebrate Earth Day coloring sheets.
How to Make a Milk Carton Bird Feeder

What You Need
- Milk carton
- Stapler and staples
- Masking tape
- A soft cloth, rag or chamois
- Brown paint (acrylic is best)
- Scissors or a knife (and adult assistance)
- Twine
What You Do
- Clean and dry the milk carton thoroughly.
- Staple the top of the carton shut.
- Tear off small pieces of masking tape and cover the entire carton with the pieces of tape.
- Using a soft cloth, rub brown paint polish all over the tape-covered carton. This will give the carton a rough, bark-like finish.
- Cut a hole (WITH ADULT ASSISTANCE) about four inches above the bottom of the carton. The hole should be approximately one or 1.5 inches in diameter. This hole is for the birds to get in and out of the house.
- Poke a few drainage holes in the bottom of the carton and two ventilation holes in the top of the carton.
- Poke a hole through the top of the feeder, string a piece of twine through the hole and hang your feeder on a tree.
